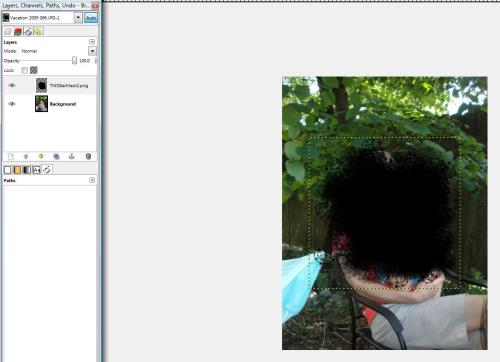
1. Open both the photo and the mask you want to use as layers (using the drag and drop method if you’d like- if you do this, be sure to open the picture first as it will likely be the larger file)

2. Choose the mask layer from the layers menu —> Right Click—> choose Alpha to Selection. After you do that the mask will get the ‘dancing ants’ effect. Don’t panic if it looks more like the mask is shimmering or animated, sometimes GIMP makes it look that way when there are partial transparencies in the mask. If it’s doing that then you picked the right thing!

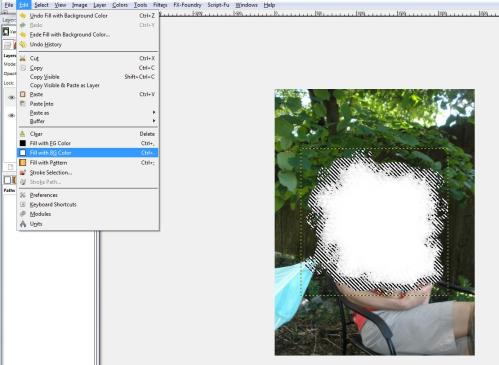
3. Now that you have your dancing ants around the mask, click Edit—> Fill with BG Color. This should make your mask turn mostly white. Again, a good thing! Now you want to copy the mask. So, click Edit—> Copy

4. Now you’re going to add the mask to the picture. Do do this, choose the picture layer from the layers channel. Right click —> Add Layer Mask. Then you’ll get a pop up, choose Black (Full Transparency) Once you click to confirm your choice, your picture will actually disappear, leaving just the white mask.


Once you click to confirm your choice, your picture will actually disappear, leaving just the white mask.

5. Now you make sure that you have the picture still selected in the Layer Menu, next to the picture you’ll see a black box with a white border- this is good. Now you click Edit—> Paste. When you do that it will actually make the portion of your picture under the mask reappear. You can then move the mask, resize it, whatever you need. Once you’re done positioning it, click Anchor Selection. Then you can delete the Mask layer (do this by right clicking on the layer, and choosing Delete Layer)
6. Now you want to Merge all the layers (this is where the clipping part comes into play) Click Image —> Merge Visible Layers.

When you do that you’ll get this pop up, Choose Clipped to Image and then Click Merge:

7. This is a totally optional step, but I always do it to make the mask more manageable to work with within a layout. I autocrop the image so that it’s only the size of the mask itself. To do that Click Image —> Autocrop Image. This handy dandy tool will automatically crop it to the size of the actual object.

Now you’re all done! Here’s my finished product to reuse in a layout. The mask is a Freebie from Twin Mom Scraps
